Create Filters in Google Sheet using Google Apps Script

Welcome !
In this blog I am going to show you how to create filters in Google Sheets using Google Apps Script. We are going to be using the following example:
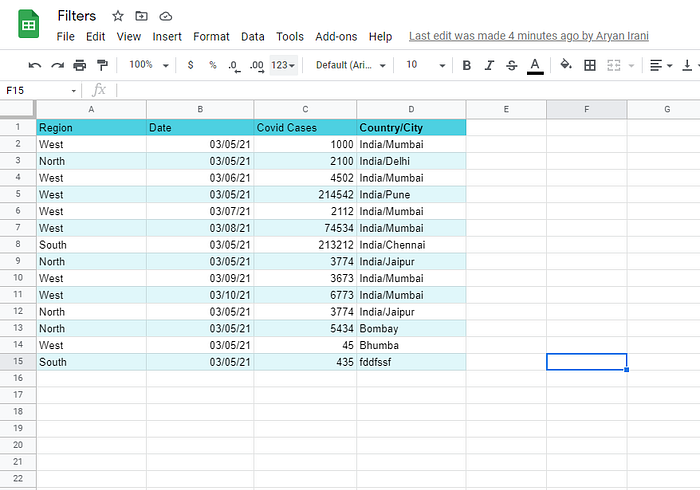
- We have a Google Sheet that contains some data regarding covid cases in India.
- We want to filter the data using the following criteria:
(1) Cases in India/Mumbai
(2) Places where the cases reported are over 1000. - Once the data is filtered, it will be transferred to a new sheet. This will help further in-depth study of the filtered data.
Let’s get started.
What is the Filter Function?
The FILTER function in Google Sheets helps you extract data that meets specified criteria. Multiple criteria can be added across columns. The FILTER function generates a new set of data while keeping the original intact.
Why use Google Apps Script to Filter Data?
Google Sheets provides a filtering function. However, using Google Apps Script to filter data will automate the process, make it faster and can be applied on various data sets.
Step 1 : Sample Google Sheet
The Google Sheet contains data on the Covid cases in different cities in India. If you prefer working with the sheet click here.
The Google Sheet contains the following details:
- Region (North, South, East, West)
- Date of entering the data
- Number of Covid cases recorded on that day
- Name of the country followed by the name of the city
Step2: Write the Automation Script
While you are in the Sheet, launch the Apps Script Editor.
To do that:
(1) Click on the tools button next to the Add-ons button.
(2) Next click on the Script Editor option. This brings up the Script Editor as shown below:
We have reached the Script Editor. Let’s Code.
function create_filter(){

(1) var ss = SpreadsheetApp.getActiveSpreadsheet();
(2) var sheet1 = ss.getSheetByName("Filter_Sheet");
(3) var range = sheet1.getRange("A:D");
Declaring the function:
(1) Get the active Spreadsheet
(2) Get the sheet to be filtered
(3) Get the Range to be filtered
It’s time to add the filter to the sheet followed by adding the filter criteria and setting them into the sheet.
var filter = range.createFilter();To add the filter to the sheet, we use the createFilter function followed by the range.
Let’s set the Filter Criteria.
What is Filter Criteria?
Filter criteria are the conditions based on which the filter is going to sort the data and give you the desired data. There are tons of filtering criteria you can use, but for this blog we are going to be using the following two criterias:
(1) whenNumberGreaterThan():
Sets the filter criteria to show cells where the cell number is greater than the number specified, which in this case is 1000. Using these criteria it will only show the rows of data that have cases over 1000.
(2) whenTextContains():
Sets the filter criteria to show cells where the cell text is equal to the specified text, which in this case is ‘India/Mumbai’. So it will show us the data regarding the cases in India/Mumbai.
(1) var Filter_Criteria1 = SpreadsheetApp.newFilterCriteria().whenNumberGreaterThan(1000);

(2) var Filter_Criteria2 = SpreadsheetApp.newFilterCriteria().whenTextContains(["India/Mumbai "]);
Here we have declared two filter criteria to filter the data. We have to first assign the filter criteria to the sheet using the SpreadsheetApp.FilterCriteria(), followed by the conditions on which you want to filter the data. There are a lot of filter criteria to learn from, to know you can check out the link below.
We have created the filter, added the filter criteria, it is time to assign the filters to the specific columns that you want.
var add_filter1 =filter.setColumnFilterCriteria(3,Filter_Criteria1);
var add_filter2 = filter.setColumnFilterCriteria(4,Filter_Criteria2);
To set the filters to a specific column we are going to use the setColumnFilterCriteria. Using this function you can specify the column number followed by the filter criteria variable.
The first filter criteria have to be assigned to the Covid cases column, which is the number 3 column. So we are going to assign the number 3 followed by the first filter criteria variable. The same is to be done for the Country/City column.
We are done with creating, assigning and setting the filter. Now we will look at how to transfer the filtered data to another sheet.
var range = sheet1.getDataRange();

  var new_sheet = ss.insertSheet();
  new_sheet.setName("India/Mumbai data");

  range.copyTo(new_sheet.getRange(1,1));

  filter.remove();
}
We start by getting the data range of the first sheet using the getDataRange() function. Next, we are going to insert a new sheet into our main spreadsheet using the insertSheet() function, followed by giving the sheet a name . Since we are going to be filtering our data for India/Mumbai, I have named the sheet as India/Mumbai data.
Using the copyTo function we are going to copy the data range to the new sheet that we have created. In the end, we are going to remove the filter so that you always have your original data with you. To remove the filter you just have to type filter. remove(), and your filter will be removed.
Step3: Check the output
Our code is complete. Select the correct function (create_filter) as shown below and run the program.

The script on successful execution will filter the data and a new sheet will be created with the filtered data.
This is the sheet with the original data. The filter was first added, then the data was transferred to the next sheet, and then the filter was removed.

This is the second sheet that contains the filtered data according to the filter criteria we had specified.
Summary
We saw how you can create filters in Google Sheets using Google Apps Script. To sum up we have looked at:
- Accessed the spreadsheet and got the first sheet containing the original data.
- Next, we added the filter to the sheet, followed by adding the Filter Criteria.
- Then we
assigned each of the filters to the respective columns. - Then we created a new sheet and assigned the filtered data to be moved there.
- In the end, after the filtered sheet had been created, we deleted the filter to keep our original data safe.
If you prefer watching the video, you can click on this link.
This is all for this blog, I hope you have understood how to Create Filters in Google Sheet using Google Apps Script. You can send your feedback to aryanirani123@gmail.com.
Originally published on the YAMM blog
